أهلا وسهلا بك زائرنا الكريم، إذا كانت هذه زيارتك الأولى للمنتدى، فيرجى التكرم بزيارة س.وج، . كما يشرفنا أن تقوم بالتسجيل إذا رغبت بالمشاركة في المنتدى، أما إذا رغبت بقراءة المواضيع والإطلاع فتفضل بزيارة القسم الذي ترغب أدناه.
هل تريد التفاعل مع هذه المساهمة؟ كل ما عليك هو إنشاء حساب جديد ببضع خطوات أو تسجيل الدخول للمتابعة.


Reve-Dz
 
الرئيسيةأحدث الصورالتسجيلدخول

شاطر | 
 

 Apple iPhone Photoshop tutorial

استعرض الموضوع التالي استعرض الموضوع السابق اذهب الى الأسفل 
كاتب الموضوعرسالة
????
زائر
avatar


Apple iPhone Photoshop tutorial _
مُساهمةموضوع: Apple iPhone Photoshop tutorial   Apple iPhone Photoshop tutorial Icon_minitimeالخميس أبريل 29, 2010 5:14 pm

Make a realistic Apple iPhone illustration in Photoshop. Quick, intermediate level photoshop tutorial.
Download psd file, iPhone isolated against a white background.
Apple iPhone Photoshop tutorial 1-iphone-photoshop-tutorial

Resolution: 610×488 px
Size: 642 KB
Format: PSD
Keywords: communication devices, photoshop tutorials, iphone psd file, a modern smartphone isolated against a white background
Author: PSD Graphics

Download Photoshop file:

[url=http://www.psdgraphics.com/file/apple-iphone-photoshop-tutorial.psd ]Apple iPhone Photoshop tutorial[/url]

Tutorial:


1. Open a new document (1280×1024px) and make a rounded rectangle with 20px radius. Add the Inner Shadow like in my example.
Apple iPhone Photoshop tutorial 2-make-a-rounded-rectangle

2. Duplicate the body layer and make it a little smaller, and fill it with black color.

Apple iPhone Photoshop tutorial 3-fill-the-body

3. To make the iPhone metal frame more shiny, add two more details at the top and bottom.
To do it duplicate the main body layer again, make a color selection (CTRL+left click on the layer in layers window),
move the selection a few pixels down and hit delete button. Duplicate the layer and rotate it vertically to make the bottom one.
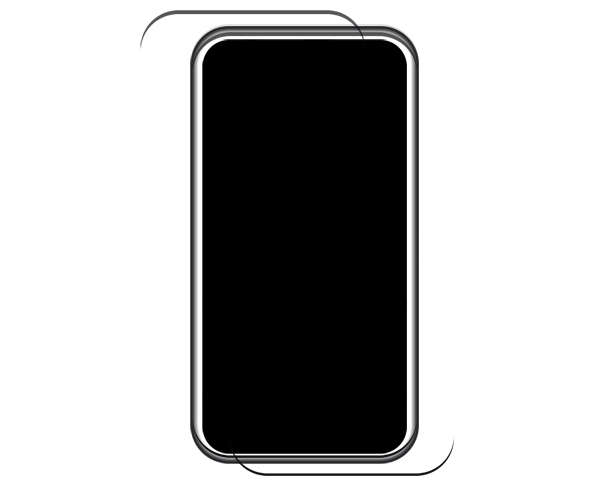
Apple iPhone Photoshop tutorial 4-chrome-effect

4. Make the home button. Create a black circle and add a gray 2px outline.
To make the glossy effect at bottom, repeat the 4th step (duplicate the circle layer, make a selection and cut).
At the end make a 4-5px radius rectangle and add 2 px gray outline.

Apple iPhone Photoshop tutorial 5-home-button

5. Add the side buttons. Make them all with 1px rounded rectangle and add a dark gray to light gray gradient.
Put these layers under all existing layers in the layers palette.
Apple iPhone Photoshop tutorial 6-add-buttons

6. Add the screen. Make a dark gray rectangle shape and add 2px outline with a bit lighter gray color.

Apple iPhone Photoshop tutorial 7-add-the-screen

7. Make the receiver. Create two identical rounded rectangles, make the bottom one in white color, and the top one in gray and outline in a darker gray color.

Apple iPhone Photoshop tutorial 8-make-the-receiver

8. Add a glossy effect on the screen with gradient tool. We are done.

Apple iPhone Photoshop tutorial 9-psd-iphone
التوقيع
الرجوع الى أعلى الصفحة اذهب الى الأسفل
ШΛŁιĐ
.:: عضو فعال ::.
.:: عضو فعال ::.
ШΛŁιĐ

ذكر عدد المشاركــات : 331
~ الـعـــمر~ : : 27
~ الـترفـيــه ~ : games
~ الــمـزاج ~ : great
~ نقاط التميز ~ : 394
تاريخ التسجيل : 21/03/2010

[ البطاقـة الشخصية ]
الجنس: ذكر ~ ذكر ~
الـدولـة: الجزائر الجزائر
<му мєѕѕagє> :

Apple iPhone Photoshop tutorial _
مُساهمةموضوع: رد: Apple iPhone Photoshop tutorial   Apple iPhone Photoshop tutorial Icon_minitimeالخميس أبريل 29, 2010 10:58 pm

merci bcp
التوقيع
الرجوع الى أعلى الصفحة اذهب الى الأسفل
http://www.reve-dz.com
 

Apple iPhone Photoshop tutorial

استعرض الموضوع التالي استعرض الموضوع السابق الرجوع الى أعلى الصفحة 
صفحة 1 من اصل 1

(( مَا يَلْفِظُ مِنْ قَوْلٍ إِلَّى لَدَيْهِ رَقِيبٌ عَتِيدٌ))


صلاحيات هذا المنتدى:لاتستطيع الرد على المواضيع في هذا المنتدى
 :: الإنترنت :: ..{ G . я . α . f . ¡ . x ~-